UE4基础--输入绑定
项目设置
打开Edit/Project Settings,设置绑定

代码实现:
- 函数声明不需要UPROPERTY修饰
ACharacter类中有一个SetupPlayerInputComponent函数,在该函数中实现输入名称与函数之间的绑定。设置中支持将键盘、鼠标和控制器输入映射到”友好名称”,该名称稍后可以绑定到游戏行为上(例如移动)。该名称稍后可以与事件驱动的行为绑定。
操作映射:对于像跳跃这样,按一下按键触发一次跳跃动作,使用
BindAction函数来绑定。操作映射处理离散事件的输入(例如,按下为1,不按下为0),最终效果是,按下和/或释放单个键、鼠标按钮或辅助键盘按钮可以直接触发游戏行为。轴映射:对于像向前走这样,需要一直按住按键,使用
BindAxis函数来绑定。通常,轴映射轴映射会不断被轮询,从而实现无缝的移动过渡和流畅的游戏行为。硬件轴(例如游戏摇杆)所提供的输入值为程度值。虽然游戏摇杆输入方法在提供可平滑伸缩的移动输入方面很有效,但轴映射也可以将常见的移动键(如WASD键或箭头键)映射到持续轮询的游戏行为。
如果你想要了解有关玩家输入的更多信息,参阅玩家输入和Pawn。
1 | // Called to bind functionality to input |
1 | //前进,由于是axis的,有一个float类型的参数 |
测试代码功能:
- ctrl + shift + B: 构建(Build)项目。
- 构建完毕后,在虚幻引擎中打开 项目。
- 在关卡编辑器工具栏中点击 运行(Play)(注意控制的人物是否是设置的那个人物类)。
- 按 退出(Escape) 键或在关卡编辑器中点击 停止(Stop),退出PIE模式。
实现鼠标控制相机转向
上下转向,需要绑定到Mouse Y(鼠标方向Y轴),scale: -1。左右转向绑定到Mouse X(鼠标方向X轴)
- UE4规定:绕z轴旋转叫Yaw,绕y轴旋转叫Pitch,绕x轴旋转称Row。
- 人物是面向x正方向的
1 | void AScharacter::SetupPlayerInputComponent(UInputComponent* PlayerInputComponent){ |
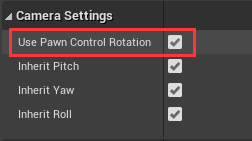
如果鼠标不能够控制旋转,查看弹簧臂中use pawn control rotation是否check
下蹲动作
实现下蹲功能,还需要在构造函数中添加
GetMovementComponent()->GetNavAgentPropertiesRef().bCanCrouch = true;
如果未设置true,则什么也不会发生。
代码实现:
1 | void AScharacter::SetupPlayerInputComponent(UInputComponent* PlayerInputComponent){ |
如果仍然不能下蹲:
LogCharacter: BP_Player_2 is trying to crouch, but crouching is disabled on this character! (check CharacterMovement NavAgentSettings)
看一下人物蓝图中移动组件的Detail面板中Can Crouch是否check。

实现角色跳跃
Acharacter 类中实现了角色跳跃。我们需要做的就是,在跳跃操作按下时*将bPressedJump设置为true,在跳跃操作释放时将该布尔值设置为false。
1 | //头文件: |
蓝图实现
官方实现的移动:
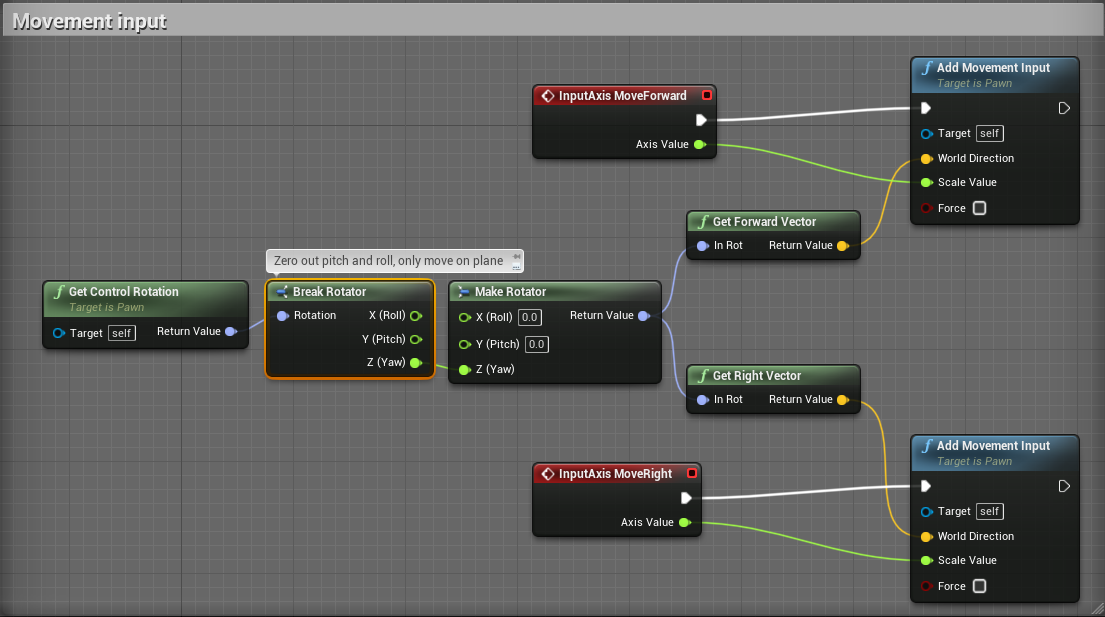
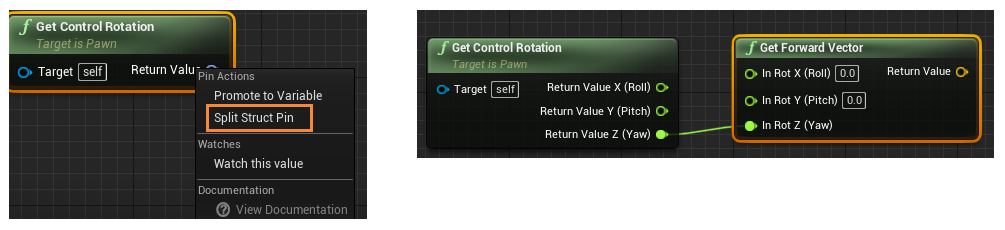
除了使用Break Rotator和Make Rotation结点,还可以直接拆分引脚:
拆分引脚而不是直接相连的必要性:如果使用原始的向量(它的方向),如果视角从上往下看人物并向前移动,人物的移动速度会很慢。

演示
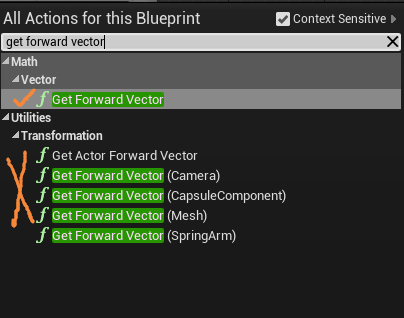
输入axis或aciton,出现的这些是在项目设置input中设置的绑定

相机围绕人物旋转
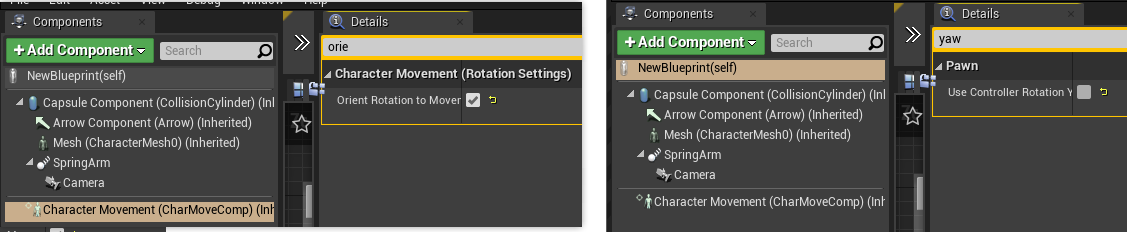
实现第三人称游戏中的相机与人物的关系(人物不动时滑动鼠标可以围绕人物旋转,人物”向后退“表现的是人物向后转面向相机前进)
需要:
勾选移动组件中的
orient Rotation to Movement取消勾选蓝图类中的
Use Controller Rotation Yaw
问题:用C++代码控制的移动,如果做上面的操作,移动是错的,待解决
猜测:代码实现和蓝图实现不一样